Posted on

A Look Back at 2018

Thank You

Zinnia’s Closet began in 2015 when I opened a shop on Etsy. I didn’t start selling because I had some new or trending idea. I wanted to learn how to run a small business without the pressure of depending on the income generated from it. Sure, I could have read a bunch of books. But nothing beats hands-on learning.

At the end of every year, I like to take the time to reflect on what I’ve learned, and what I would like to achieve.

So, here we go. What happened in 2018?

I started a website! I didn’t even know where to begin one year ago. But I took the leap, chose a web host, and here I am. Blogging isn’t easy for me. I tend to internalize everything instead of sharing it with the world. I’m definitely stepping out of my comfort zone when I write. Will this get easier over time??

I also started an Instagram account. I haven’t mastered the art of attracting attention there, but that’s something to work on in 2019. I just read an article about how to save a draft Instagram post, so at least that will take away some of the pressure 🙂

Photography has been an interest of mine for quite a while. I bought a camera a few years ago and have slowly been learning how to take photos without the “Auto” setting. Practice, practice, practice. My photos are getting better as I gain better control of the camera. In 2019 I plan to re-take many of my product photos to make them look more professional. Along the way, I’ve learned a little bit about how to use photo-editing software. I’d rather take a good quality picture with the camera, instead of a not-so-great picture that needs to be edited. But, it doesn’t hurt to learn how to fix a picture if needed.

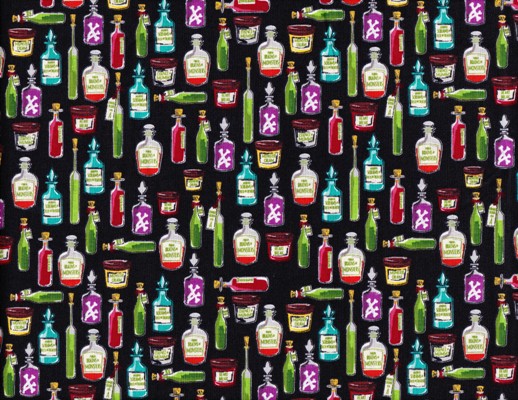
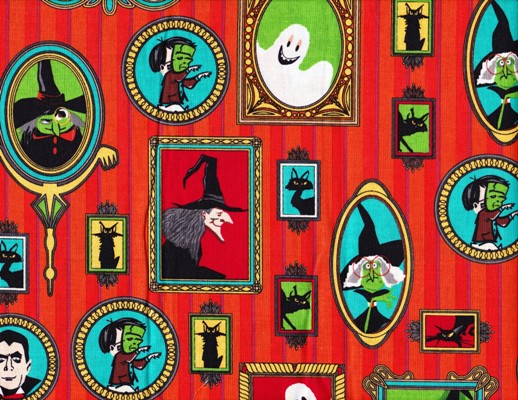
This year I started designing my own fabric! I made a few test drawings and printed them using Spoonflower. Next year I hope to start selling bags with my own fabric designs. I’ve already had a request to make bags with a custom fabric design!! I’ll have to write another blog about my adventures in fabric printing. I am very excited about this opportunity.

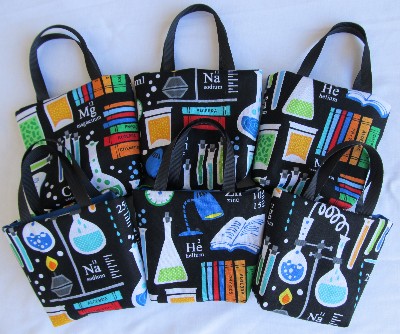
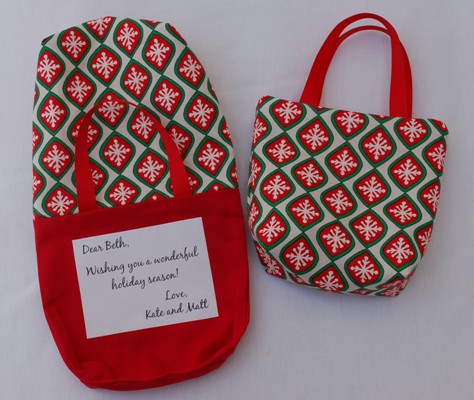
My sewing skills have increased this year! I took a deep breath and learned how to install a zipper. Wouldn’t you know, I had a customer ask for a bag with a zipper only a few weeks later! What a coincidence! Then my sister asked me if I knew how to sew a snap. I didn’t, but I figured it out!

Zinnia’s Closet hit some amazing milestones this year. In March, we hit 100 sales on Etsy. In December, we had our 100th order on Etsy, and 50 orders in just one year. There’s still a few days left in 2018, maybe we can squeeze in another order or two. I am sincerely grateful for all the wonderful customers I have had this year and am looking forward to another great year in 2019.

I have a few plans for 2019. I will continue to work on my social media and website. Of course, there will be new products. If all goes well, I’ll be offering products made with fabric that I design myself. I have BIG plans for my current customers. I’m not going to reveal my plan just yet, I want to make sure I can implement it 🙂 Eventually, I would like to make this website an e-commerce site. I don’t think that will happen in 2019, but I plan on learning enough to make that happen by 2020.

All in all, 2018 was a great year. I’m looking forward to the many lessons that 2019 will bring. Thanks, again, to all of our wonderful customers. I can’t wait to work with you again soon!

Happy Holidays!


Posted on

Family Science Night

Every year my son’s elementary school has a Family Fun Night hosted by the PTA. This year’s theme was science! Many of the area STEM camps and science companies had displays and activities for the kids. The PTA asked if any parents had ideas for experiments, and I volunteered. There are so many things you can do to teach science to young children! 

Picture this: Hundreds of families milling about on the soccer field. Music is playing. Food trucks are lined up with concessions. There are inflatable bounce houses and obstacle courses. Drones are flying overhead. Companies have booths set up with information and activities. Now throw in a laboratory. This can be quite challenging.

My first thought was: science and food do not mix. You never eat in a lab. It’s not safe.

My second thought was: kids are literally going to be running around everywhere. Who is going to pay attention long enough to do a science experiment?

Now throw in a few more challenges:

  1. Only three weeks to prepare.
  2. Budget of $150 for up to 500 kids of all ages, mostly grades K-5.
  3. No electricity available in the middle of a soccer field. No flames. No dangerous chemicals. No dry ice.

I really wanted to do experiments that were different than the classic baking soda and vinegar reaction that most kids have seen. Isolating DNA from bananas or strawberries would be cool,  but that would take too long. Making plastic milk would be interesting, but that reaction requires heat if you want to do it quickly. Making bath bombs or perfume or lip gloss would be interesting for the girls, but it would break the budget. The goal was to get a bunch of experiments together, allowing about 500 kids to participate in each activity.

Two experiments were requested by the PTA members: Mentos Geyser and Slime. Slime for 500 kids can get expensive. A gallon of glue costs $15 in the craft stores, and they don’t allow coupons. There goes a third of the budget just for slime!

I spent a few days thinking about appropriate experiments and here’s what I came up with. Clicking on each experiment will take you to a website that describes how do it. 

Mentos Geyser Add a few Mentos to a bottle of Diet Coke and watch it explode.

Slime Add Borax to Elmer’s Glue to make slime.

Can you fit through an index card? Fit your body through one index card using only scissors.

Tie Dye Milk: Drop some food coloring in milk, add a drop of dish soap and watch the colors run.

Dancing Raisins: Add raisins to a jar of carbonated water and watch them dance.

Toothpick Race: Float toothpicks in water, add dish soap and watch them race.

Stained Glass Glue: Drop some food coloring onto glue, add a drop of dish soap and watch the colors spread.

Magic Mud: Add water to cornstarch- is it a solid or is it a liquid?

Water Beads- Add water to polymer beads and watch them grow.

Rain Cloud: Add a layer of shaving cream to a jar of water, drop some food coloring on top, and watch it rain.

Dissolving Candy: Place several M&M’s on a plate with a layer of water. The colors will dissolve, but will not mix.

Salt Volcano: Add oil and water to a jar, then add a teaspoon of salt. The salt will pull the oil into the water, then it will dissolve and the oil will float back to the surface.

Bubbling Blob:  Add oil and water to a jar, then add an Alka Seltzer tablet for a lava lamp effect.

I’m happy to say I came in $20 under budget. I was lucky to find glue on sale on Amazon. The experiments were not as well rounded as I would have liked, but they were colorful and entertaining and the kids had a great time. My favorite experiment was the Stained Glass Glue. I had never done that experiment before, and I enjoyed the designs the colors made. Here’s a picture of the experiment we did at home:

Stained Glass Glue

Have you ever done science experiments with a large group of people? What experiments did you try?

Posted on

Potions and Spells: Apothecary Bottles Fabric

Apothecary Bottles

Fabric Name- Haunted House Apothecary Black by Carta Bella for Riley Blake Designs

Material- 100% cotton fabric

Background color- Black

Theme- Halloween

Description:

Colorful apothecary bottles on a black background. When I saw this fabric, I thought of a mad scientist in an underground lab, brewing up potions and spells for a frightful Halloween night.

Check out my Halloween goody bags made with this fabric here.

Posted on

Halloween Monster Portraits Fabric

Haunted House Monster Portraits

Riley Blake Haunted House Main Orange 2

Fabric Name- Haunted House Main Orange by Carta Bella for Riley Blake Designs

Material- 100% cotton fabric

Background color- Orange

Theme- Halloween

Description:

This Haunted House fabric features portraits of all your favorite Halloween characters! There’s a green-faced witch giving the stink eye to the portrait above her. A little monster wearing a monster mask. A side profile of an elderly witch. Also, there is Dracula’s face, a witch wearing large circular glasses, ghosts waving hello, and all of the feisty black cats in the family. Shown in the second picture is one of my favorite portraits- a beautiful young witch, but her shadow shows a woman with a big, ugly nose and crooked chin. Also shown here are Frankenstein and his bride.

This fabric is so much fun! I hope it gets you excited for Halloween!

Posted on

Awesome Science Fabric- Geek Chic by Studio e

IMG_20180126_0015

Fabric Name: Geek Chic Large Allover Fabric by Studio e

Material: 100% cotton fabric

Background color: Navy Blue

Other colors: Yellow, orange, sky blue, medium blue, lime green, red, gray.

Theme: Science

Description:

Laboratory glassware, chemical formulas and science icons outlined in white, on a navy blue background.

The chemical formulas and elements include: Cu, H₂O, H₂CO, H₂SO₄, N₂, NH₂, CO₂. Some chemical structures and reactions are: Cu + ½ O₂ →CuO, water, ethylene, CH₃-CH-C₃H₇, and ethane. The word CHEMISTRY is written in white letters. The fabric also has atomic rings, a beaker with a green liquid, a water bottle with blue liquid, and a gray ring stand holding a round bottom flask with bubbling red liquid. A blue burner is heating that flask with 3 yellow flames. There is an Erlenmeyer flask with a bubbling blue liquid, and a graduated cylinder with a yellow and orange liquid. Four bubbling test tubes are scattered throughout the pattern with yellow, orange, green or blue liquid. A fifth tube has green liquid that is not bubbling. Finally, there are two more beakers, one large and one small, containing a green liquid. They are connected by a curly blue tube dripping liquid into the smaller beaker.

This fabric is so colorful and cheerful! It makes me happy 🙂 Science is fun!


Posted on

A Simple Note Makes an Impact

IMG_20180519_0002

The trip to the mailbox is typically uneventful. Magazines, bills, advertisements for insurance or cable… nothing exciting. When there is a birthday in the house or the holidays are drawing near, we’ll get some cards from family and friends. This week I went to the mailbox not expecting anything other than junk, when to my surprise there was a card addressed to me. It’s not my birthday, so what could it be? It was a Thank You note!

A few weeks ago I went to an event hosted by the college I attended. I didn’t think anything of it. I spent the afternoon chatting with fellow alumni about life back then and had a nice lunch. The school was there to talk about the big changes happening on campus starting in the fall.

So I opened my mail and was surprised to see a handwritten thank you note from the school representative that attended our event! She thanked me for spending the afternoon with her. She invited me, and she paid for lunch, and there she was, thanking me! I was so surprised that she even gave me a second thought, not to mention take the time out of her busy schedule to sit down, hand write a note and put it in the mail!

With all the technology in our lives today, we are bombarded with emails, texts, and status updates. We never seem to take the time to write a letter with a pen and paper. I have to say, it is very refreshing. A small note goes a long way to let someone know that you care about them, that they are important to you. It really stands out and makes an impact.

Write a note to someone you care about today 🙂


Posted on

Fun Ways to Use Science Bags

IMG_3435 - Edited

You might be asking yourself, what can I use science bags for? Lots of things! Throw a mad science party and give them away as a party favor. The larger bags are big enough to hold a child’s paperback book- perfect for toting to the library! And what a clever way to wrap a present for your favorite science teacher on teacher appreciation day! I’ve had scientist friends use them to hold prizes at their weekly lab meetings. They like to put gift cards and candy inside. One scientist friend uses the bags to cheer up her cubicle 🙂

I love to hear all of the creative ways the science bags are used! Leave a comment below and let me know how you are using them.


Posted on

Science is Fun!

DSC_0845_CroppedResized

Did you know that I used to work as a scientist before I became a mom? I haven’t worked in the lab for quite a while, but I still love science. I also love getting kids excited about learning science. Science is fun!

Now I’m combining science and sewing by making bags with science fabric. Let me know in the comments if you love science too!


Posted on

A new idea!

As I was wrapping all of my Christmas gifts, I decided to try something new this year. Of course I was using fabric gift bags for the small presents. Usually, I tie a gift tag to the bags with the standard To/From and Merry Christmas message. As I began writing out the first tag, I had a brilliant idea! I could make the tag part of the bag! I printed out my message and attached it to the inside of the bag. Now I had a greeting card and a gift bag, all in one!

DSC_0456_CroppedResized

Then it was time to test it out on my friends. During the days leading up to Christmas, I made several deliveries, and gave each of my friends a bag with a special message inside. I waited for their reactions. They all loved how personal it was! It made the gift feel even more special and memorable.

These message tags are now going to be offered on all of the bags. Customers will have the option to purchase a bag with a blank tag (to write their own personal message), a tag with standard message (like Merry Christmas, Happy Birthday, Thank You, etc), or a tag with a custom message. The tags are 2.75″ wide x 2″ tall. It’s super simple to add your message: all you need is a regular pen or a marker.

What do you think?